

Table of Contents
Successful businesses and companies spend a lot on marketing, more than 50% of their money goes into marketing. There is a formula around this.
PRO Tip: Why do businesses and companies spend more on marketing.
There are a lot of websites to use for online marketing, these include Facebook, YouTube, Google to name a few. But from experience Facebook adverts (ads) are the best.
Reasons why Facebook Marketing is the Best
- One doesn’t need to search before they can see your ads.
- One doesn’t need to view some type of video before they see it.
- The Facebook algorithm is very smart.
- You can retarget audiences your ads were shown to before.
- You can create a lookalike audience from previous data and get even better results.
- You get to run ads on Instagram from Facebook.
Why you don’t get Good Results with Facebook Ads
Trust me, when you use Facebook ads, you’re sure to get good results except you are doing something wrong! These include;
- You targeted the wrong audience.
- You fail to use campaign budget optimization (CBO).
- Your Ad copy is poor.
- Your picture, video or thumbnail is not captivating.
- You used the wrong campaign objectives.
- Low budget.
In this post, I will teach you how to set up a Facebook business manager account professionally from scratch.
But first, every personal Facebook profile account has a personal ad account attached to it. But you need a business manager account to get more flexible with your business. Your ad account is basically to set up ads on Facebook while a business manager is a hub to access all your Facebook marketing need, including ad account, people, catalogs, pixel, pages, Instagram accounts, Offline Events sets and more.
Reasons a Company or Business must use a Facebook Business Manager
- To have more than one ad account.
- To manage permissions and have multiple employees who will access your Facebook business assets.
- To request access to multiple external ad accounts, pixel and business pages.
- To have access to business-level insights and reporting.
- To get better support from the Facebook marketing team.
The best part? It is completely free! Let’s get started;
How to Create a Facebook Business Manager Account
To create a Facebook business manager account;
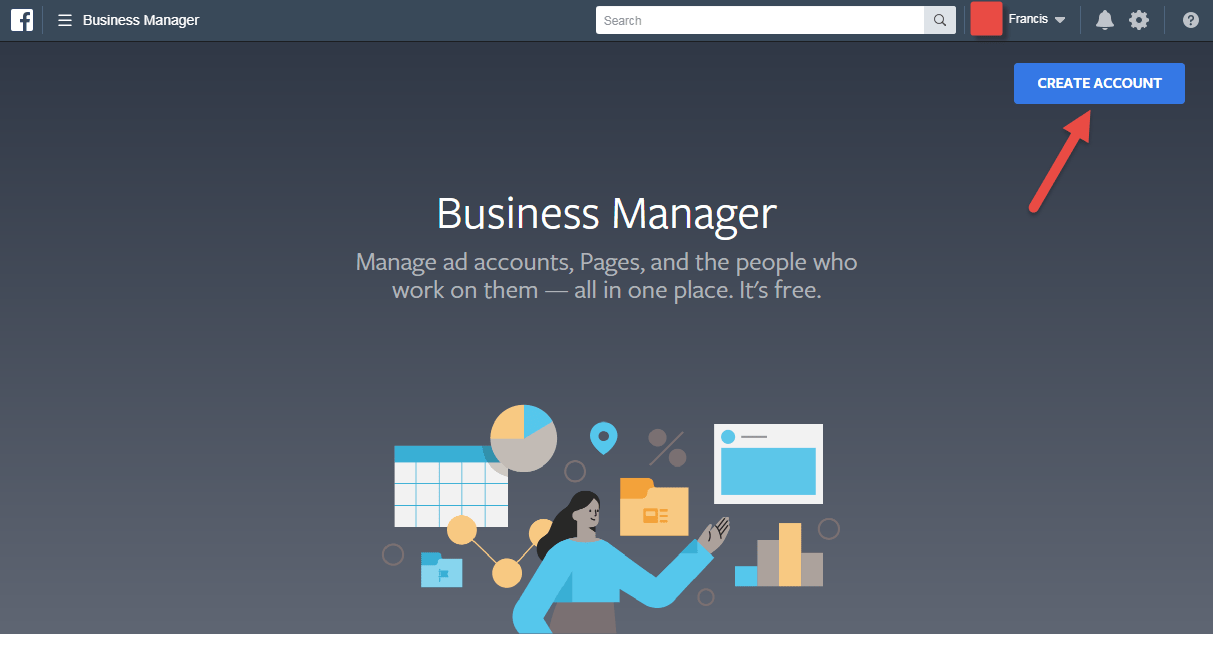
- Go to https://business.facebook.com/overview and click “Create Account”.

- Fill in your Business name and email, Leave Your name the way it appears and click Next.

- Fill in your business details, Select the Business use and click Submit.


You can name the business manager account anything you wish; it is visible to you alone, while the email is used to receive notification mail about the business manager.
Ad accounts are categorized under Facebook business manager.
Next, you create a Facebook ad account under the business account you just created.
How to Create a Facebook Ad Account
To create a Facebook ad account in Business Manager
- Click the three short line icon at the top-right corner.

- Go to Business Settings.

- Click “Accounts”, select “Ad Accounts” by your left-hand side then click the “+Add” button.

- Choose “Create a New Ad Account”.

- Fill in the Ad account name, select Time Zone and Currency. Ignore the “Payment method” since you are yet to add one. Then click “Next”.

- Next, select what the ad account will be used for and click “Create”.


Also, the Ad account name is not important as it is visible to you and anyone you give access to the ad account.
Next, you need to add your Facebook page to your business manager account or if you don’t have any yet, you create a new one.
How to Add your Facebook Page to your Facebook Business Manager
To do this;
- Click on “Pages” by your left-hand side, under the “Accounts” section then click the “+Add” button.

- Choose “Add a Page”.

- Next, type your page name, as you do that the page will appear on a dropdown menu. Select and click “Add Page”.


Next, you have to add your Instagram account to your business manager account.
But if you don’t have an Instagram account for your business, you can skip this part and still run an advert on Instagram.
Yes! you heard me right.
How?
When setting up your ads and you get to “Placements” allow the ads to run on Instagram too. When it gets to where you have to select an Instagram account on the “Identity” part, leave it empty.
When it appears on Instagram, your Facebook page name and picture will be used to represent the Instagram account. Facebook will use no Instagram account but your ad will be seen on Instagram, only that when users click on your icon or name it won’t go through. It is a visual account.
But the best is to create an Instagram account for your business if you don’t have yet.
How to Add your Instagram Account to your Facebook Business Manager
To add your Instagram page to your business manager account;
- Click on “Instagram Accounts” by your left-hand side then click the “+Add” button.

- Next, click on the “Connect Your Instagram Account” button.

- A popup browser window will ask for your Instagram phone number, username or email and password, fill them and click “Log In”. If you created your Instagram account with Facebook click the “Log In with Facebook.


Next, you need to assign the Instagram account to an Ad account.
Why do you Assign Assets to Ad Account?
By assets, I mean Instagram account, Pixels, etc. This is done because;
Let’s say you have 5 ad accounts, only the one you give access to can see the asset when you are setting up your ads.
How to Assign an Instagram Account to an Ad Account
- Click on the Instagram account username and click on “Connected Assets”. Click on “Add Assets” to assign.

- Next, select the Ad account and click “Add”.


Next, it is time to add a payment method.
How to Add a Payment Method
- Click on Payments by the left-hand side on your business setting page, then click the “+Add Payment Methods” button.

- Select your Debit card country and currency. Then fill in your debit card details and billing zip code and click “Continue”.


Next is to set up a Facebook pixel.
What is a Facebook pixel?
A Facebook pixel is a code you place on your website to track audiences who visit your website and how they interact with it. This tracks their activity around your website and helps better target your ads. The Facebook pixel code should be placed on the header of your website, so it can load first.
The main aim of this objective is to make the audience perform an action. These actions could be registration, purchase, subscribe, lead, etc.
When to Use a Facebook Pixel?
It is used when you want to track visitors and know the kind of actions they took on your website. And using these details to optimize for a better result in your ad campaign.
It is used for the conversion campaign objective; it requires a Facebook pixel to get results.
To learn more about the Facebook campaign objective click here.
How Does Facebook Know a Visitor Took Action?
Basically, you’ll set your website in such a way after visitors fill a form or took an action, they will be redirected to another page, let’s say a Thank You page. In the Thank You page you will place a Facebook pixel event code to tell Facebook this visitor has taken the action.
The Facebook pixel is a very good tool, Facebook makes very good use of it to better target your ads to people who are likely to take action
Let me explain;
Let’s say you have about 30 people who took action on your website, Facebook will show your ads further to people like the 30 people who took action already, so you can keep on getting conversions, that’s how smart Facebook is, you gonna believe me when I say Facebook is smart with their algorithm.
Facebook pixel helps to;
- Track conversion.
- Optimize ads.
- Build a targeted audience.
- Retarget ads to people who have taken some kind of action on your website.
- Target lookalike audience of people who took an action.
How to Create a Facebook Pixel
To create a Facebook pixel;
- Go to “Data Sources” on your Business Setting’s page and click on “Pixels” by your left-hand side then click the “+Add” button.

- Type in anything you want to name it and you can add your website if you wish (this is not necessary), then click “Continue”.

- Next, choose “Manually add pixel code to website”.

- Next, you will be shown your pixel code, click on the box to copy code to then click “Continue”.

Again, only you and anyone you give access to your Facebook pixel can see the name.
Now, we need to install the pixel on your website.
How to Install the Facebook Pixel on your Website
All you need to do is to place the pixel code to your website header. Don’t be scared I will show how to go about it
For WordPress users
you can achieve this;
There are 2 different methods to achieve this.
First method;
- Install and activate the “header and footer” plugin.

- Go to “Insert Headers and Footers” under “Settings” on your admin panel and paste the Facebook pixel code in the header section, then save.

Second method;
- Install and activate the pixel caffeine plugin.

- Go to “Pixel Caffeine” by the left-hand side of your admin panel and click on the “General settings” tab. Make sure the Facebook Pixel Setup is enabled. Then click on the “Facebook Connect” button.

- This will connect to the Facebook account on that browser and show you all ad account associated with the Facebook account on a dropdown menu. Select the ad account and Pixel, then click “APPLY”.

Make sure the pixel position is set to Head. You will get something like this![]()
You can also paste the pixel ID on the left-hand side in the General Settings of the Pixel Caffeine. In case you don’t have access to the pixel from your Facebook account.
For eCommerce website:
Here you don’t need to include any Facebook pixel event code to your pages, this is how to go about it;
For Shopify; add the pixel code to your header section, the rest will take care of itself.
For WordPress WooCommerce; Use the second method described above. On the General settings of the Pixel Caffeine, scroll down and activate the conversion feature. That’s all.![]()
After taking any of the steps above, the Facebook pixel can track visitors who added to cart, initiated checkout, purchased, visited any page on your website and so on, so you can run ads to retarget any of them if you wish or create a lookalike audience.
How to Confirm if your Facebook Pixels are Working Perfectly
To confirm this;
- Install and activate a chrome browser extension called “pixel helper” on your PC.

- Visit your website and click on the extension icon by your top right. And you will see “one pixel found on your website”.

How to Install the Facebook Pixel Event Code
To install the Facebook pixel event code;
- After the last step on “How to create a Facebook pixel” when you clicked “Continue”.
- Next will be the “Set up Events”. Click on “Manually add event code”.

- Next, you will be shown all the pixel event and their description. But first, you have to select your business category to get a list of events that are important to your business. You can click on “see more events” to see more events that are not really important to your business. Now, select the event that describes what you want to achieve.

- Click on the event. You can assign a worth to the event anytime it is done by enabling the “Send event parameters”. If you don’t want to, disable it. Copy the code generated.

- Next, paste it on the body of your thank you page and save. That is after the <body> HTML tag.

You can click “Go to Test event” to test if the event is working properly.
Next, we need to assign the pixel to an ad account.
How to Assign a Facebook Pixel to an Ad Account
- Select the pixel in the pixel tab and click on “Connected Assets”. Then click “Add Assets”.

- Choose the ad account and click “Add”.

How to get Facebook Pixel Code or Event Code
To get the Facebook pixel code or event code again;
- Click the pixel on the business settings page, select the pixel, and click on “Open in Event Manager” at the top right.

- A new browser tab will be opened. Click on the “Set Up” dropdown icon. You can select “Install Pixel” to get pixel code or “Set up New Events” to get event code.


How to Assign a Payment Method to an Ad Account
- Click the three short line icon and click on “Ad account settings”.

- Click the “Payment Settings” by your top left then click “Add Payment Method” button.

- Next, Select “Payment Method from Business Manager”.

- Select the debit card and click “Continue”.

- Click the “Make Primary” button.


CONCLUSION
Most newbies find it hard going around the Facebook business manager and getting things right, most time they make a costly mistake but following these steps you are sure getting your business manager account ready for high converting adverts within minutes.
The only step left out now is setting up your ads to start getting your customers in no time. For easy steps on how to set up your ads, follow this tutorial.
If you are not comfortable handling your Facebook business advert or you are scared and want an expert to help you manage and run an advert for your company or business? Kindly get started here.
Do you have any questions? Drop it below and We will answer them for you!


